Absolute Pressure Sensor Measurement Error and Troubleshooting
Absolute pressure sensors for absolute or vacuum pressure measurement in industrial production. This paper combines the cases of absolute pressure sensors in actual use, and introduces the troubleshooting and field installation experience for absolute pressure sensors from five aspects.
1. Abnormality caused by leakage in the measuring pipeline of the absolute pressure sensor
The sampling point of the absolute pressure sensor is the same as the sampling point of the pressure gauge. Absolute pressure sensor and pressure gauge have shared measuring lines and valves. Therefore, if the operation of the steam turbine and the condenser system is found to be normal during the overhaul, it is necessary to check whether the vacuum measuring pipeline has failed.
For example, when the user periodically inspects the on-site measuring instrument, it is found that the DCS display value of the steam turbine and the vacuum gauge are abnormal. After inspection, it was found that the cause of the abnormality in the measuring instrument was that the welding point of the measuring pipe was broken. This rupture is most likely caused by vibration.
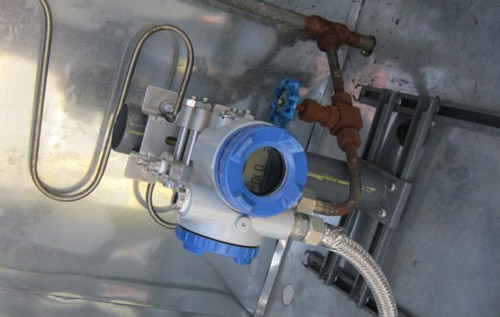
Absolute pressure sensors measure the absolute pressure during production. Solder joints, sensor connectors, valve joints, etc. are all prone to failure. Due to the small measuring range of the absolute pressure sensor, it is often missed during installation and overhaul. Therefore, it is difficult to find the leakage in the vacuum system during inspection. Such failures are often found until normal production.
From the above we can get a conclusion. When installing the absolute pressure sensor, the user must pay attention to choose the correct installation position. Be sure to connect the pressure guiding tube to the threaded interface of the absolute pressure sensor well and solder it firmly.
2. Improper installation to the absolute pressure sensor leads to the accumulation of liquid in the measuring line, thus affecting the vacuum display
Taking waste heat power steam turbine as an example, It has failed during normal operation. When the user inspected the steam turbine unit, it was found that the absolute pressure gradually increased during the condenser operation. Since the sampling point of the high-pressure condenser is very close to the sampling point of the condenser vacuum, the user checked the high-pressure condenser again. It was found that the variation in the numerical value of the high pressure condenser is large. At the same time, no obvious abnormal changes were found when checking the unit load. The user repeatedly detected the low pressure condenser, the condensing vapor vacuum, and the high pressure condenser. It was found that the display values of the first two are close, while the deviation of the latter two are larger. It was thus determined that the absolute pressure sensor is normal. This failure was not caused by a leak in the pipeline.
The steam turbine unit uses the installation method that five sampling tubes to separately sampling. So quickly came to a conclusion. For this failure of the steam turbine unit, it was caused by the inappropriate installation for the absolute pressure sensor. It caused the blockage problem when the steam turbine was running.
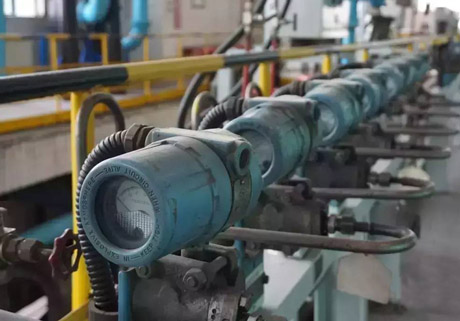
One user said that after the installation failure of the measurement instrument, they checked all the measuring pressure tubes for primary meter. In addition, they also checked and analyzed the problems in the installation of the measuring pressure tube for each primary meter. Since the absolute pressure sensor measures the vacuum pressure, the position of the sensor must be higher than the device where the pressure guiding tube is installed. In order to ensure that the condensate can be discharged from the pressure guiding tube, the user generally adopt the upward tilting method when installing the horizontal section. If the equipment does not discharge condensed water, users should check whether there is a pressure guiding tube in horizontal direction inside the equipment. If a horizontally installed pressure guiding tube is found, re-install the pressure guiding tube. Tilt the pressure guiding tube upward by 45°with respect to the device, and then purge the pressure guiding tube.
Therefore, if there is a problem with the pressure sensor installation position to the measurement instrument, the user can re-wire all the measuring tubes. It ensures that each pressure guiding tube of the absolute pressure sensor is installed according to the requirements of measuring absolute pressure, so as to avoid the phenomenon that the condensate can not be discharged in the future operation.
3. The measurement range of the absolute pressure sensor is inconsistent with the range set by the DCS, which causing measurement error
As we all know, an incorrect operation will cause meter measurement errors to occur frequently, that is, the range of the absolute pressure sensor is not adjusted to be consistent with the range of the DCS. The absolute pressure sensor can only reflect the actual value of the equipment operation for the process operation when combined with DCS. Therefore, the range of the absolute pressure sensor is set according to the process requirements. Then the range of the DCS in configuration should be consistent with the range of the sensor to avoid measurement errors.
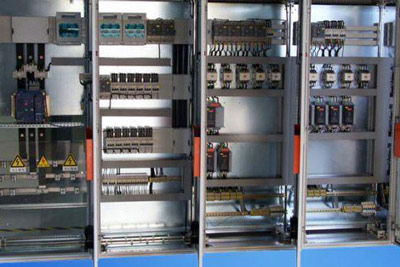
4. Absolute pressure sensor zero drift
Explain in a case again. When the steam turbine unit in the air separation unit was in normal operation, the user found that the value of the absolute pressure sensor in the high pressure condenser was increasing. Moreover, when the user inspected the device, it was also found that the measured value of the condensation absolute pressure produced a deviation. When it was discovered, the user has simply purged the tubing inside the device as before. However, after the purge process did not solve this fault. The user then decided to remove the absolute pressure sensor for further inspection. During the inspection, it was found that the error value of 0.19mA DC output appeared at every detection point in the absolute pressure sensor. The normal error value should be within 0.08 mA, which was a big difference. The user then compared this value with the previous detection results of the absolute pressure sensor. It was found that the detected values of this absolute pressure sensor before were very close to the normal measurement error value. The user thus believed that this measurement error was caused by the zero drift during the primary meter operation.
It should be noted that the absolute pressure sensor is more prone to zero drift than the differential pressure sensor and the gauge pressure sensor. The reason is mainly determined by the structure and measurement principle of the absolute pressure sensor.
5. Measurement deviations during maintenance of absolute pressure sensors
Absolute pressure sensors often have measurement errors during maintenance. The reasons are mainly the following.
5.1 Misalignment in standard instrument used for calibration
In fact, in practical applications, the phenomenon of misalignment in standard instrument used for calibration rarely occurs. However, the use of absolute pressure standard instruments is quite different from other standard instruments. Absolute pressure standard instrument inspection frequency is more than other standard instruments. Therefore, the standard instrument used in the calibration needs to be sent to a professional organization for calibration according to the required time limit. In addition, the zero drift of the absolute pressure sensor is difficult to check out in a simple way. Therefore, it is necessary to use a meter that can be directly compared for detection. It can be verified by the calibration pump of the vacuum meter.
5.2 Adjustment error
Absolute pressure sensor is extremely prone to zero drift. The possibility that the user has an adjustment error during the overhaul process is very large. Some users often make two mistakes. One is to adjust the zero point of the non-absolute vacuum to the zero position of the absolute pressure sensor. The other is to adjust the local atmospheric pressure to full scale. Users should pay more attention to adjustment errors and reduce errors during the maintenance process.
5.3 Ambient temperature effect
The absolute pressure sensor has a small range, so the change in ambient temperature has a very large effect on it. For example, when the user calibrate and adjust the pressure sensor, if the temperature in the room is adjusted from 20℃ to 8℃, its measured value will be 3 kPa higher than the previous value.
1. Abnormality caused by leakage in the measuring pipeline of the absolute pressure sensor
The sampling point of the absolute pressure sensor is the same as the sampling point of the pressure gauge. Absolute pressure sensor and pressure gauge have shared measuring lines and valves. Therefore, if the operation of the steam turbine and the condenser system is found to be normal during the overhaul, it is necessary to check whether the vacuum measuring pipeline has failed.
For example, when the user periodically inspects the on-site measuring instrument, it is found that the DCS display value of the steam turbine and the vacuum gauge are abnormal. After inspection, it was found that the cause of the abnormality in the measuring instrument was that the welding point of the measuring pipe was broken. This rupture is most likely caused by vibration.

Absolute pressure sensors measure the absolute pressure during production. Solder joints, sensor connectors, valve joints, etc. are all prone to failure. Due to the small measuring range of the absolute pressure sensor, it is often missed during installation and overhaul. Therefore, it is difficult to find the leakage in the vacuum system during inspection. Such failures are often found until normal production.
From the above we can get a conclusion. When installing the absolute pressure sensor, the user must pay attention to choose the correct installation position. Be sure to connect the pressure guiding tube to the threaded interface of the absolute pressure sensor well and solder it firmly.
2. Improper installation to the absolute pressure sensor leads to the accumulation of liquid in the measuring line, thus affecting the vacuum display
Taking waste heat power steam turbine as an example, It has failed during normal operation. When the user inspected the steam turbine unit, it was found that the absolute pressure gradually increased during the condenser operation. Since the sampling point of the high-pressure condenser is very close to the sampling point of the condenser vacuum, the user checked the high-pressure condenser again. It was found that the variation in the numerical value of the high pressure condenser is large. At the same time, no obvious abnormal changes were found when checking the unit load. The user repeatedly detected the low pressure condenser, the condensing vapor vacuum, and the high pressure condenser. It was found that the display values of the first two are close, while the deviation of the latter two are larger. It was thus determined that the absolute pressure sensor is normal. This failure was not caused by a leak in the pipeline.
The steam turbine unit uses the installation method that five sampling tubes to separately sampling. So quickly came to a conclusion. For this failure of the steam turbine unit, it was caused by the inappropriate installation for the absolute pressure sensor. It caused the blockage problem when the steam turbine was running.

One user said that after the installation failure of the measurement instrument, they checked all the measuring pressure tubes for primary meter. In addition, they also checked and analyzed the problems in the installation of the measuring pressure tube for each primary meter. Since the absolute pressure sensor measures the vacuum pressure, the position of the sensor must be higher than the device where the pressure guiding tube is installed. In order to ensure that the condensate can be discharged from the pressure guiding tube, the user generally adopt the upward tilting method when installing the horizontal section. If the equipment does not discharge condensed water, users should check whether there is a pressure guiding tube in horizontal direction inside the equipment. If a horizontally installed pressure guiding tube is found, re-install the pressure guiding tube. Tilt the pressure guiding tube upward by 45°with respect to the device, and then purge the pressure guiding tube.
Therefore, if there is a problem with the pressure sensor installation position to the measurement instrument, the user can re-wire all the measuring tubes. It ensures that each pressure guiding tube of the absolute pressure sensor is installed according to the requirements of measuring absolute pressure, so as to avoid the phenomenon that the condensate can not be discharged in the future operation.
3. The measurement range of the absolute pressure sensor is inconsistent with the range set by the DCS, which causing measurement error
As we all know, an incorrect operation will cause meter measurement errors to occur frequently, that is, the range of the absolute pressure sensor is not adjusted to be consistent with the range of the DCS. The absolute pressure sensor can only reflect the actual value of the equipment operation for the process operation when combined with DCS. Therefore, the range of the absolute pressure sensor is set according to the process requirements. Then the range of the DCS in configuration should be consistent with the range of the sensor to avoid measurement errors.

4. Absolute pressure sensor zero drift
Explain in a case again. When the steam turbine unit in the air separation unit was in normal operation, the user found that the value of the absolute pressure sensor in the high pressure condenser was increasing. Moreover, when the user inspected the device, it was also found that the measured value of the condensation absolute pressure produced a deviation. When it was discovered, the user has simply purged the tubing inside the device as before. However, after the purge process did not solve this fault. The user then decided to remove the absolute pressure sensor for further inspection. During the inspection, it was found that the error value of 0.19mA DC output appeared at every detection point in the absolute pressure sensor. The normal error value should be within 0.08 mA, which was a big difference. The user then compared this value with the previous detection results of the absolute pressure sensor. It was found that the detected values of this absolute pressure sensor before were very close to the normal measurement error value. The user thus believed that this measurement error was caused by the zero drift during the primary meter operation.
It should be noted that the absolute pressure sensor is more prone to zero drift than the differential pressure sensor and the gauge pressure sensor. The reason is mainly determined by the structure and measurement principle of the absolute pressure sensor.
5. Measurement deviations during maintenance of absolute pressure sensors
Absolute pressure sensors often have measurement errors during maintenance. The reasons are mainly the following.
5.1 Misalignment in standard instrument used for calibration
In fact, in practical applications, the phenomenon of misalignment in standard instrument used for calibration rarely occurs. However, the use of absolute pressure standard instruments is quite different from other standard instruments. Absolute pressure standard instrument inspection frequency is more than other standard instruments. Therefore, the standard instrument used in the calibration needs to be sent to a professional organization for calibration according to the required time limit. In addition, the zero drift of the absolute pressure sensor is difficult to check out in a simple way. Therefore, it is necessary to use a meter that can be directly compared for detection. It can be verified by the calibration pump of the vacuum meter.
5.2 Adjustment error
Absolute pressure sensor is extremely prone to zero drift. The possibility that the user has an adjustment error during the overhaul process is very large. Some users often make two mistakes. One is to adjust the zero point of the non-absolute vacuum to the zero position of the absolute pressure sensor. The other is to adjust the local atmospheric pressure to full scale. Users should pay more attention to adjustment errors and reduce errors during the maintenance process.
5.3 Ambient temperature effect
The absolute pressure sensor has a small range, so the change in ambient temperature has a very large effect on it. For example, when the user calibrate and adjust the pressure sensor, if the temperature in the room is adjusted from 20℃ to 8℃, its measured value will be 3 kPa higher than the previous value.


